Monday, May 30, 2016

New Blog Address!

We are now located at: www.asimmeringpotandamom.com

Come join me on the new blog for more recipes, farm adventures, homeschool stories, and cloth diaper tutorials!

~ Heather


Sunday, May 17, 2015

Day 7: Final Thoughts on the DDL Flats & Handwashing Challenge

I can't believe our week of handwashing is already over!  This was a fun challenge; I learned a lot and thought about things I never considered before.  It pushed me to try diapering methods I'd never tried before and to troubleshoot and problem solve to make them work for us.  By the end of the week I was happy with our folding routine, washing routine, and nighttime diapering routine.  I didn't change anything about our busy schedule because of the challenge.  We still had several very full days of errands, baseball games for our older children, and even a long car trip yesterday (2 hour drive to a friends farm, 2 hours at the farm, 3 hour drive home because of a stop for lunch) and all while using organic cotton interlock flat diapers, Boingo fasteners, OS Wool Wrap Diaper Covers AND handwashing them in our tub each night as well as getting everything dry in time for the next day!  I also hand washed our wet bags, cloth wipes, and some single-layer doublers.
Here's how we did:
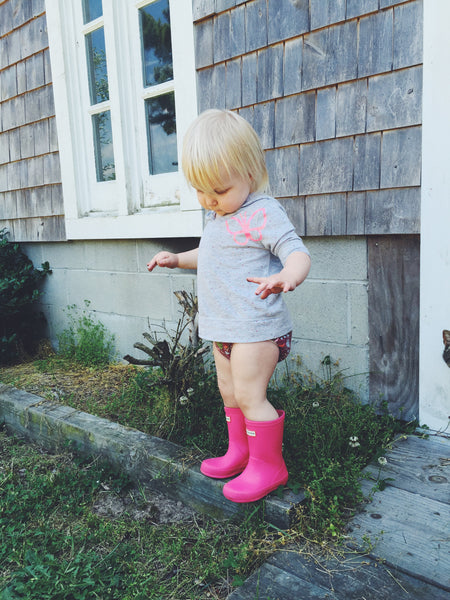
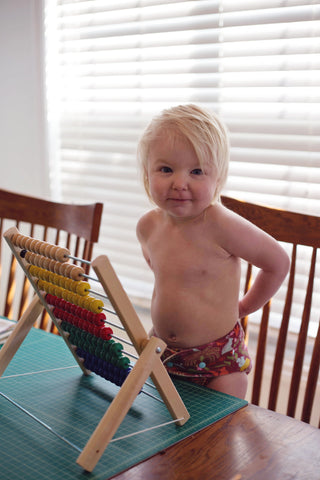
Our tiny Challenger, sweet little Eilidh Marie.

Day 1:  We used 8 flats, 3 wool covers.  2 covers had to be washed because of blowouts.  The nighttime flat I made from hemp french terry didn't work out because the fabric wasn't pre-washed and the pee just rolled right out the leg, lol, the flat wasn't even wet!  Ooops, I should know better!!
Day 2:  Experimented with different folds.  Used 8 flats and 4 covers.  Had to wash all of my covers because our experiments didn't really pan out and we weren't getting enough absorbency from our folding techniques!  Nighttime diaper rocked!  After 1 hand pre-washing I got it to absorb!
Day 3: We used 8 flats again, 3 wool covers.  No covers had to be washed - YAY!  But I did wash my older child's wool trainer (which he now wears just like underwear without an insert) because he had an accident. I didn't have a hemp flat dry for nighttime so Eilidh spent the night in a OS Sherpa Gussetted Contour Snap-in Diaper (with hemp) and I still handwashed this diaper the next day.  The new OS Sherpa Snap-in Diapers are soooo awesome and absorbent BTW.  We are loving ours for nighttime use!!  We were back to our original fold today and it worked GREAT.  Wonderful absorbency, no troubles.
Day 4:  8 flats, 3 covers.
Day 5: 8 flats, 4 covers.
Day 6: 7 flats, 4 covers.
Day 7: 8 flats, 2 covers all day, we were traveling a lot this day!  Then a 3rd cover for bedtime.
With an older baby (19 months) we never needed more than 8 flats and 4 covers.  For car trips and overnight we used a Wooly Booster for extra protection.  I had two of these in our rotation this week. I check her diaper every hour, but now that she's older she tends to hold her pee for longer and the go A LOT all at once, haha. :)
Now that we have completed the challenge, I will say this, cloth diapering with inexpensive flat diapers is DEFINITELY possible and even enjoyable.  Once you learn the folds that work best for you and your baby you will be able to to streamline your system by pre-folding and you'll be doing it with your eyes closed after a few days!  If you don't have access to a washer and dryer, handwashing is also definitely possible and doable.  It might get tedious and I'm not going to lie, I am glad I don't have to handwash tonight, but it really didn't disrupt our routine too much!  The key for me was doing the wash after my kids went to bed.  It was just a quiet part of my day.  Washing and hanging the diapers and then tidying up the house and going to bed.  If I had tried to take care of it while all 4 of my kids were up and running around the house I would have probably gotten stressed!
The challenge made me realize that families in financial crisis, who don't have a washer or dryer, would also probably be washing their entire family's laundry by hand.  That would be pretty extreme for us.  We have a family of 6 and even though I was hand washing diapers for a week I was definitely still doing a lot of other laundry in our machines!  I thought about how I could cut down the amount of clothing, towels, and bedding that we own to make handwashing a possibility for all our other laundry.  It could be done, and I even drove by a farm yesterday and saw several long laundry lines strung out and the laundry of what clearly was a large family all hanging in the sun.  It made me think about how all laundry used to be managed that way and we just had smaller wardrobes of better quality clothing.  Washing machine or not, I think I'd like that for our family.  We could certainly make our life simpler by cutting down on the amount of clothing and other washables in our life.
Finally, I want to talk about cost.  We have chosen, for our family and our business, to commit ourselves to using completely natural, and wherever possible, certified organic fibers for diapering.  This choice is not just about keeping harmful residues from chemicals and pesticides away from our child's skin, but also about supporting sustainable, organic agriculture and processing methods that keep harmful chemicals and pesticides away from ALL people, both in the field and factory, and out of our streams, rivers, and soils so that we can preserve this beautiful Earth for future generations.  I fully realize that not everyone can afford to purchase organic products, as they are usually quite a bit more expensive than conventional products. The more those of us who CAN afford them act/speak/vote by using our purchasing power towards organic and sustainable products the more affordable we make them for everyone else.
This challenge has really made me think hard about affordability.  I would love for everyone who wants them to be able to afford to diaper their baby in our organic cotton diapers and wool covers.  I am brainstorming an economical diaper package/system that will make natural fiber diapers and wool more readily available to families on a budget.  With the expense of having a large family and a small farm to run, plus a growing business, I definitely understand being on a budget even though I recognize how lucky our family is in so many ways to have access to things we take for granted like washing machines, dryers, dishwashers, a roof over our head, and room in our budget for some luxury expenditures like occasionally eating out and entertainment items like movies, books, iPads, etc.
Here's what the cost of our diaper stash for the week would look like (using our maximum of 10 flats and 4 covers + accessories):
8 x Organic Cotton Flat Diapers (homemade from fabric yardage): $32
2 x Organic Cotton/Hemp Nighttime Flat Diapers (homemade from fabric yardage): $14
4 x Organic Cotton Doublers: $0 (used scraps from making the flat diapers)
3-4 x Organic OS Wool Wrap Covers (retail price): $162-$216 (if we had used 4 Large Pull-on covers this would have been $114-$152)
2 x Wooly Boosters:  $20 (retail price)
12 x Organic Sherpa Cloth Wipes: $24 (retail price)
Our total stash cost:
Stash with Large Wool Wrap Covers (3/4) = $204 /  $242
Stash with OS Wool Wrap Covers (3/4) = $252 / $306
So roughly, $300 from birth to potty if you're using the OS Wool Wraps, which are good from 10 lbs through potty training (over 30 lbs).
No too bad considering that the average family will spend over $2000 on even the generic brand disposable diapers from birth through to potty training.
Finally, some news!  Thanks to this inspiring challenge, we will be adding hand-dyed organic flats to our product lineup very soon!  We expect to receive the organic cotton interlock yardage this week and I'll be busy dying our interlock in 6 different beautiful colors, which will be available as flats in two sizes!  Our new solid colors will also be available in OS Fitted Diapers, OS Wool Wrap Covers, and Pull-On Wool Covers.
Thanks for following along with the Flats Challenge this past week!
Peace, Love, & Happy Diapering!
~Heather

Saturday, May 16, 2015

Day 6: Our Favorite Fold


It's Day 6 of the DDL Flats and Handwashing Challenge!  Today's blogging prompt is about folds.  There are MANY tutorials out there online dedicated to the many ways to fold a flat diaper.  I'll list a few of them here:


When my daughter was a newborn we had some flats in our rotation and I loved the Origami Fold.  Now that she's 19 months old and 30 lbs we had to quickly adjust our folding methods to accommodate her size and absorbency needs!  I made up a fold on day 1 that seemed like it would give her the best fit and absorbency.  On Day 2 of the challenge we experimented with a few different folds (origami, kite, triangle, jelly roll) and I'll just say that this was our most challenging day and we could not get the absorbency we needed.  Day 3 (and from then on) we went back to the made up fold from Day 1.  Now, I'm not claiming to have invented this fold as it probably exists somewhere else already, but this is what I came up with on-the-fly that seemed practical...and worked!


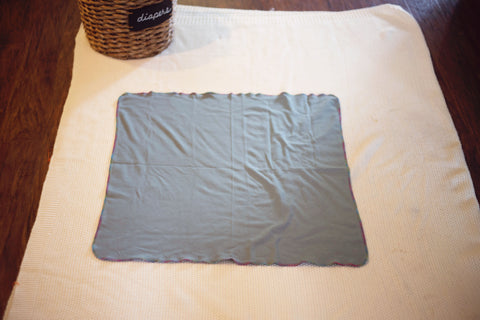
1. Lay your flat diaper out on your changing surface.


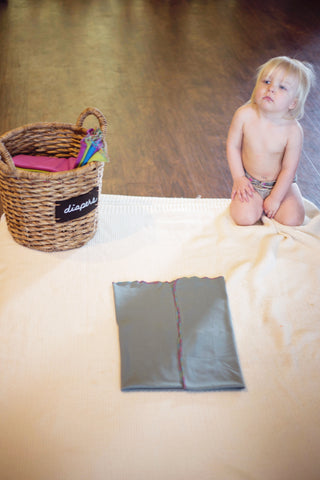
2. Fold up the bottom third of the diaper


3. Now fold the left side of the diaper in and then the right side so that they meet in the middle.

4. Repeat step 3.  Now you have 8 layers of fabric.


5. Open up the back half of the diaper so your have "wings" to fasten around your baby.


6. Place baby on diaper.  Pull the front up and the wings around and secure with a Snappi, pins, or Boingo fastener.  Then I jelly roll the legs in to create a kind of gussett/blow-out barrier. ;)


Done!


* Tip: I'm not a huge fan of dealing with poopy flat diapers folded this way, because the poop can make its way into a lot of the nooks and crannies of the folds.  To prevent this, I have sometimes been putting a 5" x 13" single layer piece of fabric on top of the diaper before securing it.  It gives us an extra layer of absorbency and it make it easier to spray the diaper down if it gets messy!


Friday, May 15, 2015

Day 5: Handwashing Diapers - DDL Flats & Handwashing Challenge

We're 5 days into the Dirty Diaper Laundry Flats & Handwashing Challenge!  We're no strangers to handwashing around here.  In fact, I try to post a picture or tip on our Facebook page every week on "Wash Day Wednesday" when we hand wash and lanolize our wool diaper covers.  We have a photo essay of our wool washing process in THIS POST.  This week has been the first time that I have hand washed almost an entire diaper stash on a daily basis though!
Here is how I have been handling our diaper laundry this week:
Throughout the day I spray each dirty diaper thoroughly with my diaper sprayer before placing it in a dry pail that hangs on the back of our laundry room door.  After I put my littlest one to bed I go and get the dry pail and empty it into our tub. First I do a cold rinse.  I spread the diapers out in a single layer so I don't have to fill the tub with too much water.  I use a hand washing plunger to agitate the diapers and push the water through the fabric to rinse them.  Then I drain the water from the tub and re-fill the tub with hot water and about 1 half tablespoon of Unicorn Baby Beyond Clean detergent.  I agitate all the diapers again thoroughly.  I drain the tub again and re-fill with cold water to rinse a second time.  After a final agitation I drain the tub and wring each diaper out as well as possible before hanging them on my drying rack.  In the morning I move them out to our porch so the sun can finish drying and sanitizing them.
When we first started out I thought I wanted to wash in a bucket, but I ended up deciding I wanted more room to agitate the diapers and flush them with water.  They would have been in a big clump in the bucket, which seemed like it would make them more difficult to wash or that I'd need to wash in batches.  I think just using the tub has cut down on my wash time and made thoroughly cleaning them easier.  Even though the tub is much larger than a bucket, I'm washing in just a few inches of water so I'm still striving to keep our water usage as low as possible.  I'm looking forward to browsing other bloggers posts about their wash methods for the challenge to see what is working for everyone and what is not!  I'd say the one problem with the tub method is that my lower back starts to hurt from bending over to plunge the diapers.  A large/wide bucket that can be elevated on a stool might be the way to go!  
The whole handwashing process only takes me about 20-30 minutes before bed.  The diapers are mostly dry in the morning and I put them out on the porch for a couple hours before my daughter wakes up and needs them.  I have actually found that handwashing does not disrupt our regular routine too much.  It has been pretty easy to incorporate it into our day!  
I've also cut down on the actual time it takes to diaper my little one by perfecting our preferred fold and pre-folding all our flats so they are ready to go when we need them!  I'll be posting about our folding method tomorrow!

Thursday, May 14, 2015

Day 4: Cloth Diapering on the Go - with Flats!

Today is Day 4 of the DDL Flats & Handwashing Challenge!  The topic today is using flats on the go, which is perfect because we had a lot of errands to run today!
Our cloth-on-the-go bag is not much different this week than it usually is.  Instead of my usual Sherpa Snap-in Diapers, this week I'm taking along flats to pair with my OS Wool Wrap Diaper Covers.  This is what we packed for our outing today:
1 x Wooly Wet Bag
2 x OS Organic Wool Wrap Diaper Covers
3 x Organic Cotton Interlock Flat Diapers
1 x Hemp Doubler
1 x Wooly Booster
For longer outings I have a little bit of a different diaper set-up, which is similar to what I do for overnight. Wool is, quite simply, nature's most perfect diapering material.  Wool is temperature regulating, keeping you cool in the summer and warm in the winter, it stretches and bounces back to its original shape, when lanolized it is an excellent barrier material while still remaining completely breathable, it is naturally antimicrobial and antifungal, it deters odors, it is a completely sustainable and renewable fiber, and our merino interlock is so soft you'd never believe it is wool! ;)  Because wool is completely breathable there is sometimes more of a risk of compression wicking when you have a wet diaper plus pressure being put on the diaper and cover, such as when sitting in a car seat.  When we go out for longer car rides or outings I use a Wooly Booster to add two layers of merino wool to my daughter's diaper for extra protection.  The Wooly Booster is a 2 layer strip of merino wool that is 5" x 14" and goes between her diaper and cover.  I hand wash these along with my wool diaper covers and lanolize them as well.  We also use a booster at nighttime.
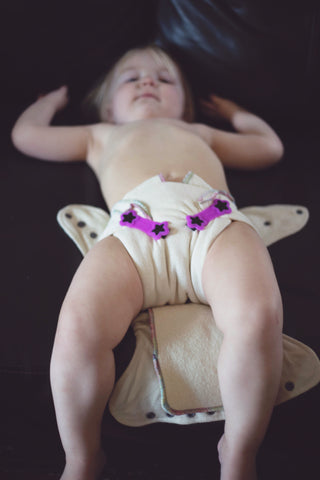
Here is a picture of Little Miss in a hemp flat diaper with her cover + wooly booster ready to be fastened up so we can head out the door!

Wednesday, May 13, 2015

Day 3: DIY Flat Diapers - DDL Flats & Handwashing Challenge

Today is Day #3 of the DDL Flats and Handwashing Challenge!  It's open topic day and I'm going to share a couple methods for making homemade flats!  So far, we are rocking the challenge here!  Definitely having fun and learning a lot!  After experimenting with some different folds yesterday I am back to the fold I made up on Day 1 because it's the only one I'm having success with absorbency-wise for my toddler.  I've been tweaking that fold and I think we're into a good routine now.  I'll definitely be sharing folding techniques later in the week!  Today has been a great day so far with no leaks, blow-outs, or damp covers at all!  In fact, today we've been rotating back and forth between the same two One-size Wool Wrap Diaper Covers all day and just airing between changes.  Even though I've allowed myself 6 covers for the challenge, we haven't had a day where we've needed more than 4. :)  I don't think I'll have any wool to launder tonight!
I made all our flats for the challenge myself.  Half of them I made from old undershirts that belonged to my husband and the other half from organic cotton interlock that I purchased by the yard.  Flats are really simple to make and if you don't own a sewing machine or serger you can even make no-sew flats just by choosing the right material (such as cotton interlock knit) that doesn't fray!
Here's how easy it is:
Option #1: Make flat diapers from fabric yardage purchase online or at the fabric store...
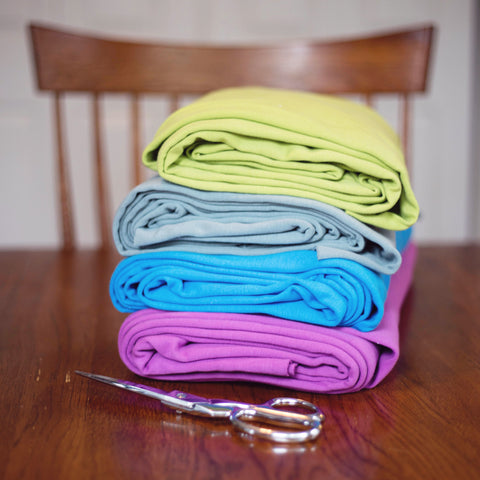
Here is a lovely pile of uncut organic cotton interlock knit.  There are many places where you can purchase fabric by the yard that can be turned into homemade flat diapers!  Both woven and knit materials can be used for flats.  An example of a commonly used woven fabric would be cotton birdseye or diaper gauze.  I prefer knit fabrics because of the stretch they provide.  My little one has chunky thighs so it keeps her comfy.  You'll also get more use out of stretchy fabrics as your baby grows!  Some knit fabrics that can be turned into flat diapers are: interlock, french terry, fleece, and velour.  I personally would always opt for natural fibers and certified organic or Oeko-Tex Standard 100 certified fabrics whenever possible.  There are many options for pure cotton as well as blends with hemp and bamboo that are great for diapers!  Do be careful with bamboo - not all bamboo is created equal and some, like "bamboo rayon," are really just like synthetic rayon because they are so highly (and chemically) processed.
Some online retailers of organic fabrics:
Most knit fabrics are going to be 54-60" wide.  That means you'll get two flats out of a yard with some extra material to spare to make doublers, etc. with.  You can maximize your yardage by purchasing multiple yards in a continuous cut.  For example, even though you can only get 2 (26" x 26") flats out of 1 yard, you can get 8 flats out of 3 continuous yards.
Most flat diapers are about 26" or 27" square.
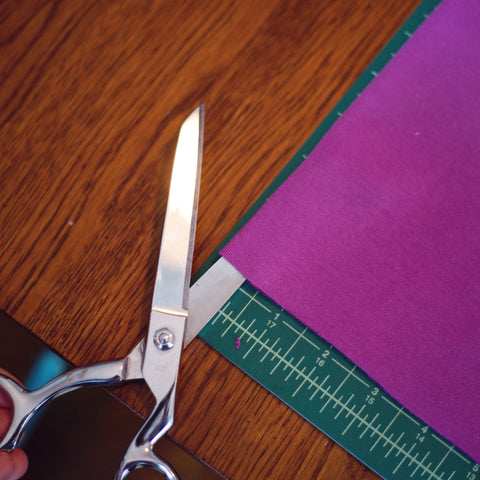
Many knit fabrics are tubular (i.e. they are in a round tube.  If you cut along one side of the tube your fabric will be 54-60" wide).  You can cut open the tube of fabric or just leave it tubular and cut out your 26" x 26" square and then cut along the fold of the side that's still connected and you have your two flats!  Easy as that! 
Here I am cutting along the existing fold of the tubular fabric.
My fabric was 60" wide, so the fabric tube was 30" wide and I only needed a 26" piece.  This left me with a 4" wide remainder to make doublers with!
8 flat diapers (they are in two layers the way they were cut, so it only looks like there's 4!)
At this point you're done if you are making no-sew flats!  Cotton interlock will not fray, so technically you don't HAVE to finish the edges.  The edges will roll up a little when washed, but they won't unravel.  If you have a sewing machine you can also hem them with a straight stitch and if you have a serger you can buy some pretty serger thread and finish the edges that way!  I have a serger, so I decided to finish mine off that way.
Here are a few pictures of my finished flats:
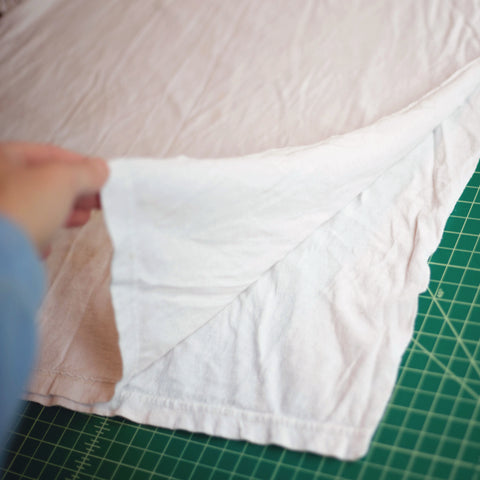
Option #2: There's another way to make flats for very little or zero cost!  You can use old t-shirts or thrift store finds.  Each shirt will get you 2 flat diapers (depending on the thickness of the t-shirt cotton you may need to double these up).
I made T-shirt flats using old undershirts of my husband's.  He's a size Large and so my flats were a little smaller than the standard size.  Ideally you would want to use Extra Large tees to get a decent size square.  I instead made mine rectangular and adjusted my folding method.
Here's how you make a T-shirt Flat Diaper:
Here's a plain, cotton undershirt.  I probably should have ironed it first since it had been in a box of scrap fabric for about a year, but....I was feeling lazy. ;)
Cut along the side of the shirt towards the arm-pit area.  Then cut along the sleeve seam to separate the sleeve from the body.  Repeat on the other side of the shirt.  Trim up any edges that are not straight and even.  We're going for a perfect square here (or rectangle if your shirts are smaller like mine)! 
Now cut off the neckline.  Make your cut nice and straight.  You can use scissors or a rotary cutter.
You can now separate the two, square pieces of fabric.  These are your two flat diapers!
Ta-da!  See how it looks like a diaper?! :)
Now put those awesome homemade diapers on your baby and feel PROUD!
#flatschallenge #bringingflatsback #makeclothmainstream #clothdiapers

Tuesday, May 12, 2015

Day 2: Show off your stash! DDL Flats & Handwashing Challenge

Wondering how the washing went last night?  Not too bad!  I'm sure for those who handwash every day this can be a tedious chore at times, but I'm one of those weird people who likes tedious activities because they force me to slow down.  Last year my dishwasher broke and I hand washed dishes for about 6 months until my parents came to visit and promptly took me to Lowes to replace the dishwasher.  I wasn't in a rush to repair or replace it because I actually liked handwashing the dishes.  It was relaxing and gave me time for reflection.  I also have off-grid fantasies where I have one of these awesome old-fashioned wash tubs and wringers:


But alas, I had nothing so quaint last night.  I washed in a basin in my bathtub with a hand plunger-looking thingy, like this: http://www.amazon.com/MobileWasher-Operating-Washing-Machine-Emergencies/dp/B003SQ7I5S/ref=sr_1_1?ie=UTF8&qid=1431436917&sr=8-1&keywords=hand+washer

During the day yesterday as I changed diapers I REALLY thoroughly sprayed them down with the diaper sprayer.  This is a must.  If I didn't have a sprayer I would have gotten some rubber gloves and toilet dunked/rinsed the diapers as I went.  This makes wash time a lot easier and less icky.
I did a rinse, wash, rinse, wring, hang to dry, done!  My wonderful friend Becky, who sews our beautiful diaper covers, actually spent a period of time hand washing out of necessity when she was moving and she advised me that I would have to do a lot of rinsing to get the suds out from washing them, HOWEVER, I only had to do a single rinse after washing because the Unicorn Baby Beyond Clean is an HE detergent and the sudsing was minimal even though the diapers came out completely clean and fresh!  Yay!  Here they are hanging in the morning sunshine (they didn't quite dry overnight):
Ok, the blogging prompt for today was "show off your stash" so here are some pictures of our stash of homemade flats!
For the challenge we have:
8 organic cotton interlock flats (these are absorbent enough to use just 1 flat for a 19-month-old, 30 lb. toddler)
8 upcycled T-shirt flats (these are much thinner and I have to double them up)
Thats 12 total diaper changes for during the day.
We also have:
2 organic cotton and hemp french terry flats (these are for nighttime, and I made two single-layer boosters to go with them)
I'm trying to keep the stash reasonable, so even though I have quite the collection of wool covers over here, I am limiting myself to no more than 6 in the rotation this week, but SO FAR we've only needed 3!
Yesterday we used: 8 flats total (including her nighttime flat) and 3 wool covers to get through the day.  We had 3 blowout poops and 2 covers had to be washed so I am going to be adjusting our folding methods today!
If you want to see a photo essay of how we wash and lanolize our wool covers, check out THIS POST.

Day 1: The 5th Annual DDL Flats and Handwashing Challenge!


May 11th 2015
Today kicks off the 5th Annual Dirty Diaper Laundry Flats and Handwashing Challenge! Read more about the challenge HERE. I guess I must have been living under a rock for the past few years since I only recently discovered the DDL blog!  I just love all the information provided there by Kim and Laura.  What a fantasic resource for cloth diapering parents and parents-to-be!  When I heard about the #flatschallenge I jumped right on board!  I have cloth diapered for 9 years now and used just about every style of cloth diaper imaginable, but I have never actually hand washed diapers!  I have been fortunate enough to always have access to a washing machine.  Even during military relocations when we were in temporary housing or hotels I was able to use communal washers or laundromats to launder diapers.
I remember, way back at the beginning of my cloth diaper journey, reading a blog post about a family that traveled the world with their infant son and hand washed simple flat diapers and covers as they went.  That kind of dedication amazed me!  I also know that some families are in financial crisis and do not own a washing machine or dryer.  They might wish they could use cloth and save money over buying disposables but feel like that wouldn’t be a practical option.  Or they might not even know that cloth diapers are an option at all!  This challenge illustrates just how possible hand washing is as well as how economical and simple cloth diapering can be!  It’s also another way that we can get the word out about the many benefits of cloth diapers so that we can #makeclothmainstream!  A flat diaper can be made from an old cotton undershirt for pennies (and I’ll have a tutorial on how to do that soon!), a flat diaper can also be made from any type of natural, absorbent cloth fabric, which can often be purchased by the yard inexpensively.  Certain types of fabric don’t even require finishing with a sewing machine or serger!  We have a passion here about certified organic fibers, both to support sustainable, organic agriculture and to keep harmful chemicals and pesticides away from our baby’s skin.  I was able to make a stash of certified organic flat diapers for less than $30.
Here's a little intro to what our set-up is for the challenge: I will be diapering my 19-month-old, 30 pound daughter using homemade organic cotton interlock flats, upcycled cotton T-shirt flats, organic cotton and hemp french terry flats (as our nighttime option) and organic wool diaper covers (both our OS Wool Wrap style and our Large Pull-on style covers).  We will be washing using Unicorn Baby Beyond Clean and a hand plunger.  I wanted to keep our stash reasonable and small, because part of the challenge is to illustrate how economical cloth can be.  I made 8 organic cotton interlock flats, 8 upcycled T-shirt flats (I have to use these doubled so this gives us a total of 12 diapers for the day), and 2 nighttime flats.  This means we will have to wash every evening to be prepared for the next day.
So far on day 1 my observations have been:
* I’m amazed that we are getting enough absorbency for a large, older baby with just a single flat diaper!  This is with the organic cotton interlock.  With the upcycled undershirts I have to use two layers because they are much thinner material.
* We have not had a single wool cover with a damp exterior, so I know we have the absorbency right!  I also loved that when we had a poop diaper, the way the flat was folded and secured kept our wool cover CLEAN!  Big plus there!
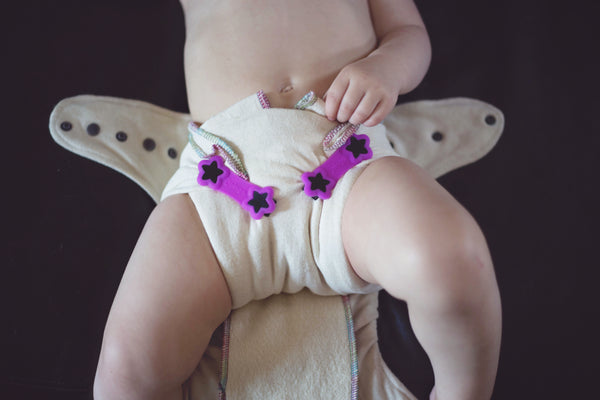
* Because the interlock is stretchy I am able to get a great fit, even on a larger child, with a 26” x 26” flat and 1 Boingo fastener (see picture). 
* Definitely glad I have a diaper sprayer!  Thorough spraying is going to save me a lot of time and ick-factor when it comes to the handwashing! ;)
More updates after we wash tonight!

Friday, March 21, 2014

Kefir Blueberry Muffins

You can bake with kefir just like you would bake with buttermilk.  Even though we're trying to cut back on our consumption of grains here, it's hard when the kids are always requesting braided semolina bread or kefir pancakes.  It takes the edge off the guilt when I can bake without refined sugar and using cultured foods like kefir!  If you're into soaking your grains you can soak the flour in the kefir overnight before adding the rest of the ingredients and baking.  I always soak my grains and flours if I have the time. :)

Here's our most recent kefired creation, Kefir and Raw Honey Blueberry Muffins:


1.5 cups organic flour
1/2 tsp. sea salt
1 tsp. baking soda
1/3 cup raw honey
1/3 cup grapeseed oil (or melted butter)
1/3 cup kefir
1 egg
1 cup wild blueberries (fresh or frozen)

Combine dry ingredients in a bowl and mix well.  Combine wet ingredients in a separate bowl and mix well.  Add wet to dry in the bowl of a stand mixer with paddle attachment and mix until just combined.  Fold in blueberries.  Scoop by the heaping spoonful into your greased or lined muffin tin. Note:  I use FSC certified unbleached and chlorine free baking cups (yes, these exist!) to line my muffin pan, it makes for easy clean up!  Bake in a preheated 400 degree F oven for 25 minutes (less if blueberries are not frozen).

Enjoy!

Thursday, March 20, 2014

Spring Equinox & Planting with the Moon Cycle, Part 1: Cultivating the Soil

I would like to write a series of posts this season about planting according to the moon cycle and moon signs. This is a centuries old practice followed by farmers and those living close to the land and it extends to much more than just planting.  In reference to the moon's potent sway over bodies of water, Pliny the Elder, a first century Roman naturalist, said that the moon "replenishes the earth when she approaches it, she fills all bodies, while, when she recedes, she empties them" (The Old Farmers Almanac).  This gives us a guide for when to plant certain types of vegetables and fruit.  Just as the moon's gravitational pull determines the tides it also has an impact on moisture in the soil.  Tests have actually proven that seeds absorb the most moisture on a full moon (gardeningbythemoon.com). Generally, plants that bear their fruit below the ground (root vegetables) should be planted when the moon is waning and those that bear fruit above ground when the moon is waxing.  There are much more detailed guides than this and some break the monthly cycle down into quarters to be even more exact.  I am going to start this series of posts with the cultivation of the soil that is necessary before beginning to plant for the season.  Today is the vernal equinox (or Spring Equinox).  The day and night are of equal length and this day marks the beginning of longer days and shorter nights.  It's a perfect time to begin preparing our garden for the onset of spring.  We have already seen Mother Earth starting to wake from winter slumber and come alive on our homestead. Chickens are laying eggs, goats are kidding, the ground is greening, fruit trees have started to bloom, and I even saw the first bluebird yesterday!  Today we are celebrating these signs of fertility and re-birth and hoping to be blessed with a fruitful garden this season!  This weekend we will be very close to the 4th quarter of the moon cycle, the moon is waning (heading from full to new) and the moon will be in Sagittarius.  The waning or receding moon is considered a dry time, especially the 4th quarter.  The "semi-barren" sign of sagittarius also makes this time particularly suited to preparing the bare earth for planting.  This is the time to kill any weeds, do any pruning, prepare your soil, and perform any other general management.  If you live somewhere warm and have already done this, the 3rd quarter of the moon cycle, which we are still in this week, is when it is best to plant crops that bear their fruit below the ground; carrots, radishes, and so forth.  It is also best to plant fruit trees during the 3rd quarter even though they bear their fruit above ground.  We will be planting some carrot seedlings in pots to celebrate the spring equinox today, which happens to fall into the 3rd quarter of the moon phase.  Every year I use this activity to have the children draw a parallel between preparing the physical soil and planting the actual seed and preparing their spiritual soil and planting a "seed" for some kind of personal growth inside themselves that they can nurture for the rest of the year.

Tuesday, March 11, 2014

Feeding Urban Goats: Mixing and Growing Your Own Grains and Herbs for Optimal Nutrition

This post is more for my own records than anything else!  I am constantly tweaking what we are doing around here with feeds because I want to give all our animals the best of the best!  I like to hand-mix grains and herbs so I can have full control of the diet, ensure quality, and learn about what they need for a balanced diet.  So, ideally, our goats would have access to acres and acres of pasture and browse and would get to forage among varied species of plants, bushes, trees, herbs, etc.  Unfortunately, due to our space constraints (we are on half an acre and only a quarter acre is available for our farming endeavors), we cannot provide our goats with their ideal meal.  I have had to research the best way to keep them in top physical condition and producing the highest quality milk for us in an unconventional environment. That means in addition to hay they need to be supplemented with grains, herbs, and fresh greens/veg.  This is my current plan for the goats, with notations about which vitamins and minerals they will be getting from each ingredient:

Hay: 

We are switching to Chaffhaye or "pasture in a bag."  Chaffhaye is made from alfalfa that is harvested in its prime, sprayed with a kiss of molasses, vacuum sealed and fermented for optimal nutrients and digestion.  More information can be found here:  www.chaffhaye.com

We will continue to provide pesticide-free coastal grass hay to supplement this and as an activity for the goats.  The chaffhaye is fed by weight, whereas the bale of coastal is free choice and is more for their enjoyment since goats like to reach up and pull out the long-stemmed hay and munch on it.  They feel like they are browsing and the long stems are good for their digestion.

Grains:

Whole Oats 
Rolled Barley
Field Peas
Black Oil Sunflower Seeds

Top Dressing for goat food: 

This is sprinkled on top of their chaffhaye and grains to provide them with extra vitamins, minerals, and variety in their diet as well as for different health benefits and increased milk production.

Carrot Powder - vit. A, calcium, C, iron, sodium

Sesame Seeds - B1, B2, B6, copper, iron, magnesium, manganese, phosphorus, zinc, calcium, iron, sodium

Sunflower Seeds - B1, B5, B6, E, copper, iron, magnesium, manganese, phosphorus, potassium, selenium, calcium, C, iron

Parsley - A, B2, B9, C, E, K, calcium, copper, iron, magnesium, manganese, potassium, selenium, zinc

Basil - A, B6, B9, C, E, K, calcium, copper, iron, magnesium, manganese, potassium, zinc

Nutritional Yeast - B2, B3, B9, iron, sodium

Wheat Bran - B2, B3, B5, B6, magnesium, manganese, phosphorus

Flax Seeds - B9, magnesium, omega-3's, calcium, Iron, vitamin C, sodium

B12 - need cobalt to synthesize - green leafy veg OR mineral supp.

Organic Citrus Rinds - C

Rose Hips - C, *birth prep

Fennel - calcium, magnesium, sodium, zinc, iron, *birth prep *milk production

Red Raspberry Leaf - calcium, iron, magnesium, B vitamins, *birth prep

Thorvin kelp - iodine

Fenugreek - iron, selenium, phosphorus, calcium, *milk production

Nettles - A, C, iron, potassium, manganese, calcium, sodium, *milk production


Additional Supplements:

Molasses - B vitamins, etc.  (they get this from the chaffhaye now)

Vitamin E capsules for does about to kid or just after kidding - to help speed healing

Raw ACV (with mother) - probiotics, digestion, coat, overall health

Himalayan Sea Salt - free choice, trace minerals

Baking Soda - free choice, digestion


Things we are growing in the garden this year for our goats

(and bunnies, separate post on bunny diet later!):

Carrots/Carrot Tops
Sweet Potatoes
Kale
Dandelion Greens/Roots
Spinach
Parsley
Basil
Oregano
Rosemary
Sage (not for preggos)
Chamomile
Red Raspberry Leaf
Grape Leaves


Thursday, February 20, 2014

Rejuvenate: Planting Seedlings and Thoughts on Unschooling

A quick pic on the iphone that I took yesterday while planting seeds with my little loves.  This past month we have had two snow storms blow through, which is very rare for our area.  Having my husband home from work and playing in the snow with the kids was a blast, but now I am ready for spring!  Suddenly this week the sun came out, it warmed right up to 75 degrees, the chickens started laying, and the peach trees bloomed! The goats' udders are filling with milk and babies will be here soon.  I can feel spring coming and my soul feels reinvigorated!  We started planting seedlings yesterday in peat pots so we can nurture them until we are sure the danger of spring frost has passed.  My two-year-old loved filling the peat pots, he's at that wonder-filled age where he loves helping with household chores and tasks.  It warms my heart when I see how proud he is that he helped with something important on our homestead.  My 7-year-old decided while we were planting that he wants to take photos of the seeds sprouting every day and put together a flip-book that looks like a time lapse photo. What a great idea!  

One of the things I love most about homeschooling and "unschooling" is that my children often come up with their own, independent projects and I can use those as a springboard to teach them something or just watch them learn, grow, and create on their own and be there if they have questions or need me to help them find materials.  It is tremendously humbling to watch other human beings learn and explore, especially young children.  I feel that most of the time, especially in a traditional school setting, children's explorations and learning experiences are channeled and directed, even down to the minute details, by the overseeing adults.  To the point of stifling curiosity, creativity, and imagination altogether.  Homeschooling has taught me to be open to everything and not to push my wants, opinions, and priorities on my children.  I am an observer, watching the learning unfold.  I have certainly learned as much from them and from this experience as they have from me.  It's funny, I look at my two younger ones who are 5 months and 2 years and I think about the massive amount of learning that occurs in those early years.  It happens with encouragement and support from parents, certainly, but no set curriculum.  Then suddenly children reach school age and it's this mad dash to find the "right way" of teaching them and there are hundreds of methods for approaching every activity and subject and thousands of professionals with opinions on one method or the other.  What I have learned from my children is there is no "right method" for anything.  Some things will be right for one child and all wrong for the other.  They are unique beings with different ways of learning, seeing, and thinking.  They have different interests and goals.  While it may not be convenient for parents or educators or even possible in certain settings, flexibility and independence is the only way to support true learning.  Being fluid and noticing the learning styles and the needs of each child.  Knowing when to step back and just let it happen.  Think about how we learn as adults, once we're out of the school system, if we want to know about something or we have an interest we look it up, we read about it, we pursue it.  Maybe we even enroll in a class, I'm not saying there isn't value to that.  Because when you WANT to know about something and you are passionate about it that is different than being forced to learn about it.  I don't take credit for my children's learning or even like the label "teacher."  They are the ones doing the work.  Just a few weeks ago I watched my son put together a compass by himself.  I'll admit, I wanted to be part of what he was doing and I asked if I could help but he said "no, I've got this mom."  He chose this activity himself, read about compasses, followed the directions for making one, busily working and stopping to ask me for "a glass of water" and a "piece of tape" and then going right back to his project.  When he was done he proudly showed me the working compass he had created and gave a mini-lecture to his siblings and me about how compasses work, the four directions, magnetic north, etc.  All of this he did on his own, with vigor and passion, because he wasn't being forced and his process wasn't being intruded upon. So, even though I do have to step in and direct some of our activities in small ways, this is the type of learning that I want to take up the bulk of our time.  Self-directed life learning.  It was such a foreign concept to me in the beginning because I needed to shift my perspective.  The more I have started to view everything we do every day as learning or "school" the easier it has become for me.  I've been asked how many hours a day we "do school" for.  That has become an impossible question to answer.  While we are awake we are learning, everything we do during the day is an opportunity for learning.  Lessons are not lectures but discussions with mom and dad about the world and topics that the kids want to know about, usually a question from one of the children is a catalyst for these discussions and the kids ask us very insightful questions.  The Olympics are happening right now and we have started learning in both conventional and unconventional ways about the countries of the world.  What we've been watching on TV, seeing different athletes, flags, etc. mingles with discussions about world cultures and governments, print outs of maps, and games where the children race to label the countries.  It's a beautiful mess but we are learning!


One of the things I am most excited about this year is that both our school-age children are starting their own businesses.  Through this endeavor they will use math, they will write things, they will read things, they will learn basic business skills and practice decision-making, critical thinking, and creative thinking.  They will interact face to face with people (both children and adults) and see the real life results of their work.  They have both decided they want to save for their own computers, so they have a lot of work ahead of them!  They have already created their business plans, worked on their branding and marketing strategies, put the framework of their businesses into place, decided on pricing, set goals for themselves, and thought about their company ethos and ways that they can give back to the community and the world when their businesses are successful. Within the framework of their businesses they are learning many other things about the natural world as well as many practical life skills.  I do plan on sharing more about this in depth in another blog post as I am very excited about what the kids are learning on this adventure!

Well, I really just meant to post a picture of us planting seeds and express my excitement about spring, but started thinking about homeschooling.  So there you have it, a little insight into our way of learning and "schooling" around here.  And like I said, there's no one way for everyone (every child or every family) so this is not meant to judge the way other families are homeschooling or the choice made by other families to send their children to public or private school.  Just my musings about our family and our lifestyle. ;)


*Note: I generally dislike labels, but sometimes they are useful and while searching for like-minded parents and professionals at the beginning of our homeschool journey I came across the term "unschooling."  It is the label that most closely reflects our educational philosophy and what we are doing with our children.  If you've never heard the term and are curious about it, here are some resources:


Life Learning Magazine

http://www.lifelearningmagazine.com/index.htm

Wikipedia: Unschooling

http://en.wikipedia.org/wiki/Unschooling

John Holt: What is Unschooling?

http://www.holtgws.com/whatisunschoolin.html

The Beginner's Guide to Unschooling:

http://zenhabits.net/unschool/


Books:

Teach Your Own

The Unschooling Handbook


Unschooling Rules


Radical Unschooling


A pretty comprehensive list of unschooling books on Amazon:

http://www.amazon.com/Unschooling-Books/lm/R3RHR7NL0UN1NW


Tuesday, January 28, 2014

Our Miniature Dairy Goats + Why We LOVE Raw Milk


If you follow my Instagram feed (see right sidebar) than you've probably seen lots of pictures of goats appear there since May of last year.  Unbelievably, though it has been eight months since our new four-legged-furry-friends came into our lives, I still have not written a single blog post about them!  So, here goes....

Last May, for my birthday, we got 5 miniature dairy goats.  After years of talking and dreaming about getting goats, it finally became a reality.  Now, let me point out here that we live in a typical suburban subdivision on a half-acre lot.  In the past, we felt this precluded us from getting any livestock (except chickens, we have always had plenty of those!).  We are outside the city limits, so technically we can own livestock, we just didn't think we had the space for it.  After discovering and researching Nigerian Dwarf goats, we went to visit Nigerian Meadows Dairy Farm in Wallace, North Carolina.  We met many goats there, played with adorable kids (baby goats), learned how to milk a goat, and learned more about their space and housing requirements, feeding, breeding, etc.  We even got to witness one of their goats (soon to become one of our goats!) in labor (she kidded 3 hours after we left!).  We were sold. Two weeks later I made the trip back up with the kids (hubby was at work this time) and we came home with five miniature goats in the back of our car.  Our starter herd.  Our herd consisted of two doelings (3 months and 6 months old), two does (first fresheners already in milk), and a buck.  Our adult girls weighed about 50 pounds at this point (still growing).  Adult Nigerian Dwarfs don't get to be more than 75 pounds full-grown and ours are still quite a bit smaller than that.  Nigerian dwarf goats are considered rare by the American Livestock Breeds Conservancy.  They are extremely gentle and loving pets and produce a startling amount of milk for their small size.  A doe in milk can produce up to 2 quarts (or one half gallon) of milk per day and can stay in milk for 9 or 10 months, being dried off a couple months before kidding again (goats have a 145-150 day or approx. 5 months gestation period).  Different breeds of goats produce milk with slightly different flavors and different butterfat content.  Nigerian Dwarfs produce the sweetest milk with the highest butterfat content (6-10%).  Let's just say it is delicious.  Nigerian Dwarfs can also breed year round, whereas standard breeds can only be bred in the fall.  Definitely an advantage for a small farm wanting to be in milk year round and stagger breedings.


There are a couple rumors floating around about owning dairy goats that I'd like to dispel here.  I've heard on forums and blogs people saying not to get "first fresheners."  A first freshener is a goat that is in milk for the first time.  All our goats were first fresheners and it was no problem at all!  I'm not really sure what the reason is for people saying not to purchase first fresheners...could be they think for a novice having a goat that hasn't been trained to the milk stand will be a hassle.  Goats are highly food motivated.  Put grains in the bin attached to their stanchion and believe me they will hop right up there and chow down and hardly notice you milking them!  One of our girls starts to tap dance around the stand a bit when she runs out of grains, so we have to either milk her fast or my husband gives her what he calls "magnet boots" and holds her back legs in place so I can finish milking without her dancing around, haha!  Another thing might be that first fresheners do not usually produce as much milk their first year.  We still got plenty out of our girls, that's for sure, but we are excited to see their production increase in their 2nd year.  So there you go, you just have to be patient.  I think the important thing is finding a healthy, happy goat from a reputable farm and even if they haven't freshened yet, look at their lineage as far as milk production goes and you can get a good idea of what their production might be like.  You can also get an idea of what their udder attachment will be like, although perfect udder attachment doesn't necessarily mean more milk and if you aren't going to show your goats conformation might not be your highest priority.  That said, poorly attached udders can cause other health concerns and discomfort, so if your goat is to produce milk and not just be a pet, do ask questions about this.  If your goat is just a pet (not to be bred and not to be in milk) they won't even 'make an udder' so no worries!  

Another myth, I heard repeatedly that you should pen your bucks far away from your does because they will go crazy trying to get to the females and because their proximity to the does can make the milk taste "goaty."  JUST NOT TRUE.  Goats are herd animals.  If they aren't near other goats or animals they will be desperately lonely and cry all day.  That IS true.  We only have one buck and he is penned right next to the girls, he shares a fence on one side.  Does he harass the girls?  Absolutely not.  Is he a crazy, wild beast?  He is the sweetest boy ever.  Does he stink up to high heaven?  Nope.  He has a "buck scent," whereas the girls don't have any scent at all, but it is not strong or offensive.  We actually never smell him except when the girls are in heat and even then you would need to actually be in the pen with him or touch him to notice it.  Does the milk taste "goaty"?  Not even a teeny, tiny bit.  Tastes just like cow milk, but better because it is FRESH!

We are anxiously awaiting our first goat babies, due next month!  Lots of pictures will be posted on our homestead's Facebook page and website!  If you're interested in owning Nigerian Dwarf goats, we will have a few babies to sell as well!

Now that you know all about our goats, here are some fun facts about RAW MILK from naturalnews.com:
Raw Vs Pasteurized Milk Graphic


Read more about RAW MILK:


Defending the rights and broadening the freedoms of family farms and protecting
consumer access to raw milk and nutrient dense foods

Wednesday, December 4, 2013

Happy Birthday Hutcheson!

I put together a little collage that I posted on Facebook on November 29th, but forgot to post it here! For our little man:


Wednesday, July 3, 2013

Barefaced and Beautiful - Giving Up Makeup for My Daughter's Sake

I wear makeup.  I don't know the statistics here, but I'd venture to say that most adult women do wear makeup, if not on a daily basis, then at least from time to time.  I don't wear it as often these days, and I've never worn much makeup, but when you are naturally blonde and have virtually transparent eyelashes, a little mascara is nice sometimes.  When I was 8 years old I became involved in community theater, wearing full stage makeup for performances.  Naturally, I enjoyed looking "grown up" at that age and by the time I was 12 or 13 I was wearing makeup every day to school.  I've never thought much about it.  Other girls my age were also wearing makeup.  By the time I reached high school pretty much every girl was.  Of course, as we grow up, almost every image of a woman that we see in a magazine or on television is of a woman wearing makeup, and nowadays they're most likely airbrushed as well.  And then we have studies, such as this one, (paid for by major makeup industry tycoons BTW) telling us that wearing makeup "increases people’s perceptions of a woman’s likability, her competence and (provided she does not overdo it) her trustworthiness,"  this is "according to a new study, which also confirmed what is obvious: that cosmetics boost a woman’s attractiveness."  Why should women have to change their appearance in order to be successful and appear "competent," while men have never had to do so?  And why is it "obvious" that makeup makes women more attractive?  I guess maybe more attractive by the general public's standards, but it makes me sad.  

The other day I was putting on mascara in the bathroom and my 5 year old daughter walked in and asked what I was doing.  Without thinking I said, "making myself pretty for Daddy."  Oh how I wished I could swallow those words.  As soon as they were out of my mouth and I heard them aloud I knew that was not at all what I wanted my daughter to hear.  I immediately started to back pedal saying "but you know, Daddy always tells me I'm prettier without make up."  Which is true, my husband always tells me that I don't need makeup.  But it's kind of an addiction, isn't it?  My daughter then says, "well then why are you doing that?"  Silence.  I don't know.  Why was I doing it?  Why do I do it?  Why do I put eyeliner and mascara on before I go out in public?  Why? I'd never thought about it before and now some serious thinking ensued.  I guess because it's part of my routine, and part of how I've come to see myself in my mind's eye.  My image of my true self is the one that is "done up."  But that's not me.  That's not my true self.  I'm just used to seeing myself that way.  Does it make me feel more confident and attractive?  Yes, actually.  Because I've spent decades having that positively reinforced.    

What I know is this.  I have a young daughter.  About to turn 6.  She is a very unique little girl. She largely cares nothing at all about popular culture, TV, models, pop stars or any of that silly nonsense.  I dread the day when that might start to change.  I relish watching her roll in fields of clover, skip through the yard to feed the chickens, play in the mud....it's not that she hasn't started receiving some of these pop-culture messages about how girls are "supposed" to behave and look.  I mean we can't shelter her from life, and those messages are everywhere - from seemingly harmless television shows, to the toy aisle at Target.  It's just that she chooses not to care or be influenced by it.  I am scared that could change.  I want her to be true to herself, and to value her intelligence, wit, humor, creativity, and uniqueness over physical beauty.  I want her to be proud of being different and having unique interests, and I want her to have a positive image of herself and her body.  I realize that I am her number one example of that.

I recently came across another survey, this one conducted on behalf of the Renfew Center, which is a non-profit that works to prevent, treat, and research eating disorders,  in which 65% of the survey participants started wearing makeup at the tender ages of 8-13 years old.  The survey found that at least one in five young girls had negative feelings associated with not wearing makeup.  Many girls surveyed felt it was most acceptable to go barefaced to the pool or beach but least acceptable to show up at a friend's house or school without makeup on.  

I can imagine my sweet little girl, maybe as few as 2 years in the future feeling like she can't leave the house without mascara, because mom doesn't and her peers don't.  Wanting to make herself "pretty" for her dad or her first crush.  My heart sinks.  She is so beautiful, inside and out.  I don't ever want her to feel like she needs to change herself.  And so I've come to a difficult decision.  Should I give up makeup for the sake of my daughter?  I kind of think I have to.  It seems like a silly thing, but it's actually pretty difficult.  Women out there, can you imagine quitting makeup cold turkey?  Completely revolutionizing your own self image?  Admit it, if you wear it, it has more hold over you than you realize.  It's even a little scary.  I know there will be special occasions for which I may don the mascara, but for now I think I'll try going barefaced.  My daughter may still wear makeup someday, I can't predict that now, but I know it won't be because she saw that I could never leave the house without it.  I want her to know she can be barefaced and beautiful.  I want her to understand, even though it's a cliche, that it's what's on the inside that makes her truly beautiful anyway.

Saturday, June 22, 2013

Eeek! Squash Bugs Are Here! How to Make Neem Oil Spray at Home...

Squash bug eggs on the underside of a leaf
We generally get along well with insects around here.  We highly value the beneficial bugs in our garden, like ladybugs, honeybees, the elegant mantis, even spiders, but some bugs just have to go.  Today, while inspecting the garden, my husband found squash bug eggs on the underside of the leaves of some of our squash plants.  He went into full panic mode instructing me to rush into the house and produce a neem oil spray.  Good thing I have neem oil on hand!  I thought it worth blogging about this helpful oil and the recipe for our spray.

Neem oil (Azadirachta Indica) is pressed from the fruit and seeds of the Neem tree, which is native to India.  It has a plethora of traditional medicinal uses as well as farming applications.  In traditional medicine, including Ayurvedic medicine, neem has been used to treat inflammation, fever, skin irritations, eczema, psoriasis, ring worm, head lice, leprosy, athlete's foot, and even as a spermicide.  It is both antibacterial and anti fungal and has immunostimulant properties.  It is generally recommended that neem NOT be taken internally.  For external uses it is best to dilute neem in a carrier oil of some kind as it is quite potent (and also doesn't smell great!).  I'm not going to expound on medicinal uses in this post so if you're interested in using it medicinally please do your research and make sure you are using/mixing correctly.

Onto farming applications.  Neem is a wonderful companion for organic farmers.  It has been proven as an organic biopesticide.  While it is harmful to many "pest" bugs, such as squash bugs, mealy bugs, aphids, Japanese beetles, cockroaches, flies, thrips, mites, termites, mosquitos, and the list goes on, it is NOT HARMFUL to beneficial insects such as butterflies and honeybees!

The fatty acid composition of neem oil can vary widely depending on the method of processing.  I have heard reports of leaf burn almost exclusively from people who bought neem pesticide sprays from their garden center.  We have not experienced this, but formulate our homemade neem spray using neem oil intended for medicinal use in humans.  We use the Now Solutions brand pure and natural neem oil.  If you're concerned about leaf burn, my neighbor recommended only spraying the undersides of the leaves (this is where the bugs lay their eggs - squash bugs anyway).  We've been spraying everywhere, just to cover all the bases. :)

Here's our recipe:

5-10ml neem oil (5 is probably fine as a preventative measure, 10 if you already have an infestation)
1-2ml dish soap (just a squirt, I never measure)
26 oz. warm water

Mix in a spray bottle and you're ready to go!

Sources for this post:
Esoteric Oils - Uses of Neem Oil
Wikipedia - Neem Oil

Thursday, June 20, 2013

Musings on Our Unconventional Life


I have so many thoughts bouncing around in my head today, I just have to take a minute to write some of them down.  A friend posted this article on Facebook this afternoon: Have American Parents Got it All Backwards?  I'd rather not paraphrase, so go ahead and hop over there and give it a read or some of my rambling won't make as much sense!  In very broad terms it got me thinking about how we have so much backwards, not just parenting choices.  I am constantly confounded and bewildered by what the mainstream assumptions are as far as what choices are "good" and "normal" concerning pregnancy, birth, food, education, and the list goes on.  I'm not saying that I'm better than anyone else, and I'm certainly far from perfect.  We don't need anymore "mommy guilt" than we all already have.  But I do have strong beliefs, and my husband and I are navigating the waters of life and parenthood together and finding that we are quite unconventional when it comes to...well, most things.

I didn't really learn anything new from reading the above article - I already agree with most of what the author has said, and I believe that we (Americans) do many, many things backwards in our society, usually in the name of doing what is "right" or "safe" or "politically correct."  I also already knew that many other cultures birth, raise, feed and educate their children in wildly different ways from us and that many of the children raised in those cultures are healthier and happier for it.

When you move away from what is considered mainstream in your parenting decisions it's hard (especially in public) to not sometimes feel judged (as in "do you see what she is letting her child do??").  Other observers might even try to step in and fill the parenting role that they perceive you being inadequate at filling!  Just recently my children were playing on a staircase.  My husband and I were standing at the bottom and this woman swooped in and said "No, no, no, you three get down from there!  You are going to hurt yourselves!  Do you see what they are doing?"  My kids all stopped playing abruptly and gave my husband and me bewildered looks as just moments before they had asked if they could play on the stairs and we said "sure, why not?"  I look at the well-meaning intruder and say "Wow, you're a little intense.  We do see them.  We gave them permission to play on the stairs."  "Well, as long as you're watching them...."  They are our children, we take care of them without your assistance every day of their lives, and we are perfectly capable of making decisions regarding their safety and supervision, thanks.  For that matter, the children need to be able to learn to decide what their own limits are and they are generally quite astute at assessing what they are capable of doing safely and what is unsafe or risky.  Sometimes they take the risk, and that's part of learning and living.

So here's my confession:  Our children are allowed to ride their bikes around the neighborhood unsupervised, play in the yard and care for our animals unsupervised, complete households tasks and chores without their hands being held, choose what they want to learn about and take charge of their own educations, play in the dirt, play in the water, make messes, make mistakes, play outside all day long on a "school day" if they want and not do a lick of "book work," climb fences, climb trees, skateboard, take risks,  decide what to spend their money on, decide what they want to read, make new friends, fall down, wash dishes, make their own meals, experiment, ask questions, get frustrated, get bored, and at the end of the day, despite their independence from us in so many ways, we still have a family bed.

They don't always do these things on their own...but they can if they choose to.  They can also ask for help.  When they become interested in a certain subject or have a specific question for us, we listen and we facilitate.  We provide them with resources, inspiration, and encouragement.  When they want to tell us something or ask us something we don't brush them off, we listen.  It is the foundation of our home (un)school philosophy.  We have to be available all day, every day, to listen.  To answer questions, to look things up, to engage with them and be honest with them.

Even though our 5 year old daughter still shares our bed and needs plenty of time to be loved and treated like a child (because she is one), she is also the most independent child I have ever met.  Every day she waters all the plants in our large garden, harvests ripe vegetables, reports back to us on the state of the plants, what bugs she saw, what looks healthy and what doesn't, collects the chicken eggs, feeds and waters the chickens, goats, and her indoor rabbit, and the list goes on.  She adores helping to cook, bake, and clean with us.  She helps care for her baby brother and never gives me a hard time when I ask for her help or a for a favor.  She is always eager to help, has an amazing work ethic, and boundless curiosity!

Our 7 year old son likes to play video games and we don't stand in the way of this.  He also loves to ride his bike and play baseball.  He has amazing hand-eye coordination and a mind-boggling memory.  He is incredibly intuitive and is always reading peoples' emotions and body language with uncanny accuracy.  Despite his love for gaming, computers, and all things electronic he is still a social butterfly!  He makes new friends all the time and easily adapts to new social situations regardless of the age of his counterparts.  He is fascinated by weather, science, and math.  He hesitates to try new things, but once he gets a little taste of confidence he takes off.  We know this about him, so we know the right way to provide positive reinforcement when introducing new concepts to him.

Our 19 month old in no way lives in the shadows of his brother and sister.  He has a huge personality!  He is also extremely independent and we let him be independent!  He plays in the yard, with the animals, gets dirty, gets wet, problem solves, and has a blast.  Feeds himself with utensils and has for ages, but also still breastfeeds.  He drinks from a cup, builds things, communicates with us extremely well despite having very little vocabulary, and is the most cuddly, loving, and affectionate baby.  He is allowed to explore, secure in the knowledge that he has our unwavering love and support.

We are trying to raise children who are free-thinkers, independent, down-to-earth, self sufficient, passionate, curious, caring, grounded in reality, but wildly imaginative.

I still haven't figured out how to accomplish all of this, but I know that we have to move far, far away from what is mainstream and forge our own path for our family.  It's the only way (for us) to survive and thrive in this backwards world we live in.  If giving birth to my children in my living room, owning dairy goats, learning to hunt so our family can have wild harvested animal protein, growing vegetables, taking charge of our family's health by practicing herbalism and alternative medicine, not vaccinating our children or animals, unschooling,  practicing extended breastfeeding, sharing a bed with our kids, and striving for complete self-sufficiency for our family makes my husband and me "strange", then so be it.  It is what it is and we are who we are.  Every day we learn new things, every day we get closer to our goals, and every day we open new doors to understanding the world and the universe and our place in it.  It's a fun, frustrating, awe-inspiring journey.  Sometimes I feel hesitant to share with people some of the more "unique" aspects of our family and then I wonder, what am I ashamed of?  The things that might make others think we are crazy are the same things that I think make us who we are!  I love our family and I love our unconventional life.

"People can save the world by the way they think and by the way they behave and what they hold to be important." ~ Cindy Lauper